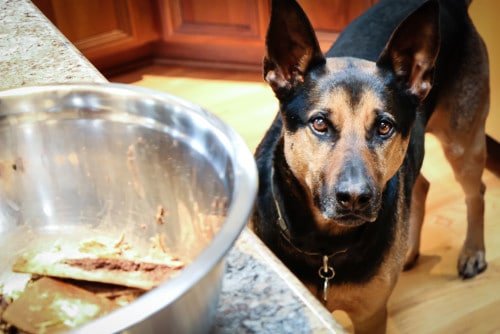
"Hey mom! Do you need a working dog to help in the kitchen? I think you do."
Welcome back to saving your gut and your money while making delicious dog treats!
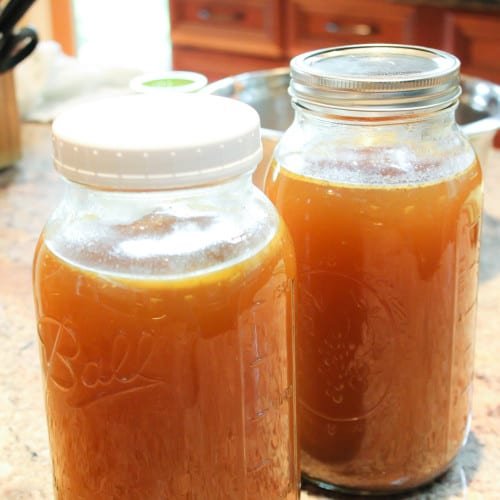
In Part 1 of this topic, I took you through my bone broth process. Typically, I use broth medicinally, but I don’t need it so much for that now and I started using it in my cooking. I made a basic Risotto using bone broth for the first time, instead of store-bought broth, to go with a Chicken Provencal stew and I swear Internet, Mr. Wild Dingo was bowled over with giddiness of how amazing my basic Risotto tasted this time.
“It’s your best Risotto yet,” he exclaimed, as he shoveled a spoonful into his mouth.
Mr. Wild Dingo never goes superlative on my cooking. That’s because his taste buds were killed by years of diet coke and McDonalds.
All I could say is: “It's all about the broth, 'bout the broth, no store-bought.” So you see, bone broth is such an easy way to boost the flavor--and nutrition--of your favorite meals.
So now that you’ve made your bitchin’ bone broth, you have a bunch of left over goop that you strained. That goop is good stuff. It’s basically mashed down bones, veggies, a little bit of broth.
Now you’re probably wondering, “ isn’t onion, which you put in your broth, bad for dogs?” Well, yes which is why I usually leave it whole then fish it out toss it out later. Certainly large amounts of raw and cooked onion are quite toxic to your dog. Though I give my dogs bites of stew that I cook with onion in it, I’ve certainly never given them large amounts of onion. Until recently, I truly didn’t know that even small amounts of cooked onion, in stews, and most any dish cooked with even trace amounts of onion can be toxic on a lesser level as well! So, to be safe, if you’re making bone broth for yourself and you intend to make treats with the left over bone meal and veggies, leave out the onion of the broth making part. I know I will.
You're probably also wondering how to convert all this goop into something your dogs will leap for. So let’s get started.
I break down my kitchen projects into smaller jobs, so after straining my broth, I’ll refrigerate the bone broth goop in Tupperware for no longer than 2-3 days.
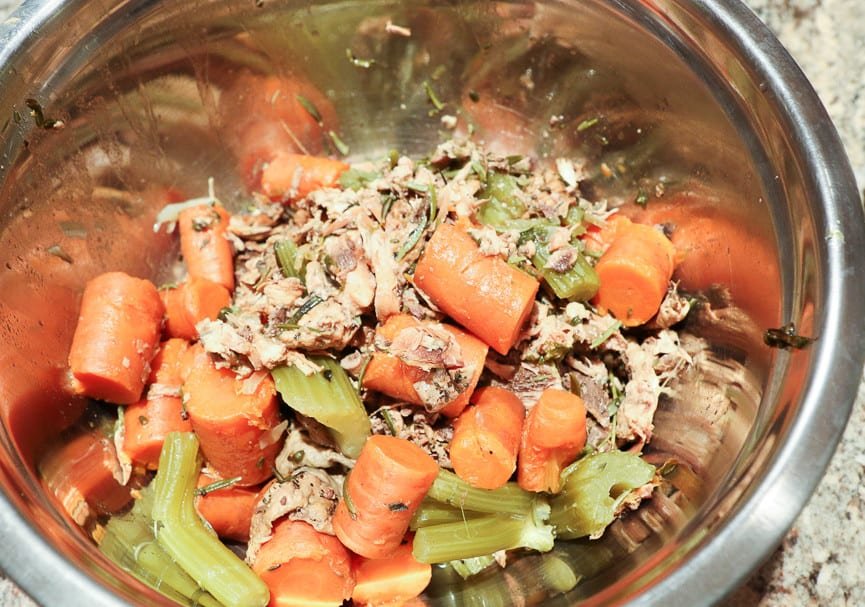
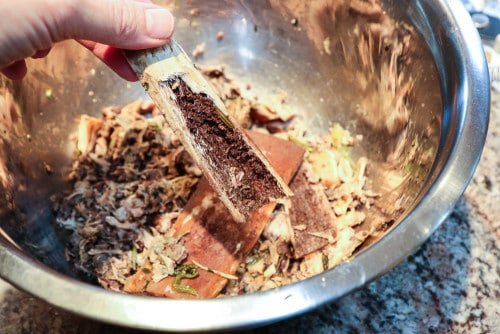
When I’m ready, I sift through the bones and pull out any of the hard bones that don’t break down in the broth cooking time, and throw it away. In this batch above, most of the bones are ground down chicken, but the rib I’m holding is a beef bone that I broke apart to pull out the marrow and put back at the end of my broth cooking. These hard-to-break bones get thrown out. If you really want to, you can continue to cook these hard bones down for days and they will eventually break down, but I don’t have the patience. I have bones up the kazoo stored in the freezer waiting to be cooked. I have enough chicken bones in the goop that are mashed all the way down.
Next, here’s where a Vitamix will come in handy. If you don’t have a Vitamix, don’t worry, you can still use a regular blender. If using a regular blender, you must break down all your bones to mush and throw away any shards you can’t break down, or your blender may get stuck, or worse, break. A Vitamix, however, can break down even the little shards.
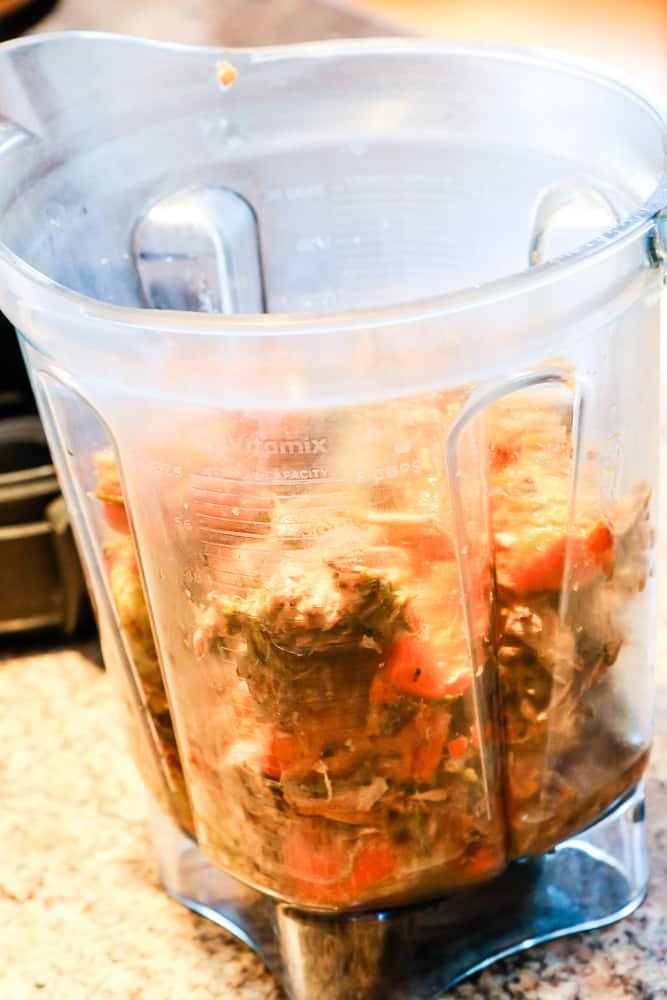
After pulling out any hard bones and/or shards, toss the goop in the Vitamix or blender. If there isn’t enough water in your goop, add a little of your own bone broth to it because you’re going to purée this bad-boy and you’re going to need a little help in the way of making it a bit wet.
Even with the Vitamix, I don’t just turn it on and forget it. There’s a lot of hard stuff in here and you want to make sure you don’t have a serious kitchen accident. That's why I also wear protective eye covers just as a precaution.
Start the Vitamix or blender on low and slowly increase to a higher setting. Each time the blender gets stuck, take it off, shake it around, or stick a spatula inside and mix it up. Keep repeating this process over and over for a few minutes, up to 5 minutes. Soon, the goop will start spinning smoothly on its own and won’t get stuck. That’s when you can either increase the speed to high for a minute or two, or set your Vitamix to “Puré” and let it run the cycle.
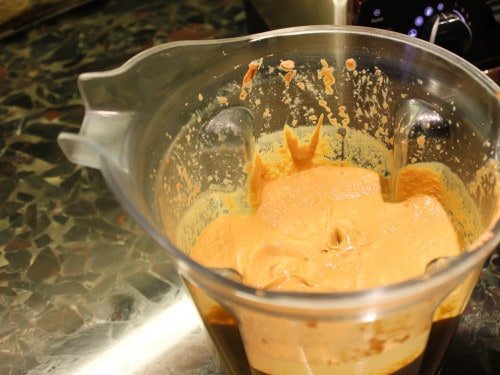
This is what the goop looks like puréed all the way down. No shards, nothing sharp. Pure bone meal and vegetables.
I won’t lie Internet. This part is not easy. You have to sit with the machine for a few minutes and try not to panic as your machine grinds through this. Just be ready to shut it off. I keep one hand on the lid and on hand on the control so I can turn to off the second it gets stuck.
Before dumping it out of the mixer, if I remember, I make a mental note of how many cups of Puré the Bone Broth Goop yeilds. You can see it's like pudding but not too drippy.
Once the hard part of the puré is done, the fun part happens. I don’t have an exact recipe for you. Do you think I’m Betty Cracker? I’m actually a very bad baker. Just ask Mr. Wild Dingo about the pumpkin ‘cakies’ I made. They were supposed to be cookies. They were inedible, Internet. This is why I mainly bake for the cracker and criminal, who are happy participants in my baking experiments.
Don’t worry. I’ll break it down for you at the end of this lengthy post. I’m sure all 12 my readers are 10x the baker I’ll ever be, so you can make some creative changes to this idea.
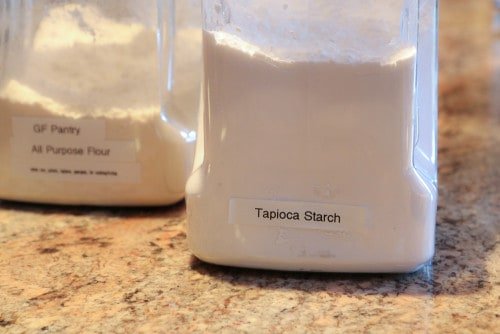
From here I work with two flours: Gluten Free all purpose (which includes brown rice, white rice, and tapioca) and straight up Tapioca Flour. If you’re not into adding grains at all, you can use all Tapioca or Potato flour. Some dog cookie treats use only Tapioca to produce a soft pliable treat. Tapioca flour, derived from Cassava, a starchy root-vegetable from South America, is used as a thickener and produces a chewy non-crunchy texture. However I found that just using tapioca leads to a very sticky treat and I didn’t care for texture, so I balance it with a bit of GF all-purpose flour. I aim to produce a soft, pliable treat that isn’t sticky and doesn’t produce too many crumbs. Brown rice also makes a nice alternative to an all-purpose flour. Since my dogs’ main diet is raw and cooked meat & vegetables, I don’t worry too much about using a little grain in their homemade treats. In addition, the grains I use are naturally anti-inflammatory and gluten free. I encourage you to try other flours, grain-free or otherwise.
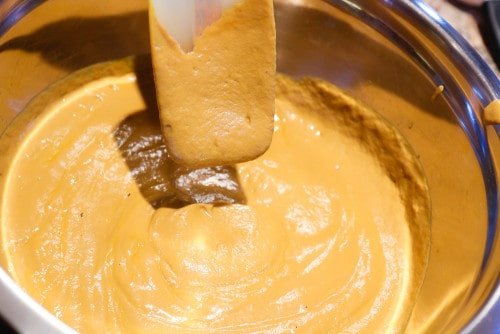
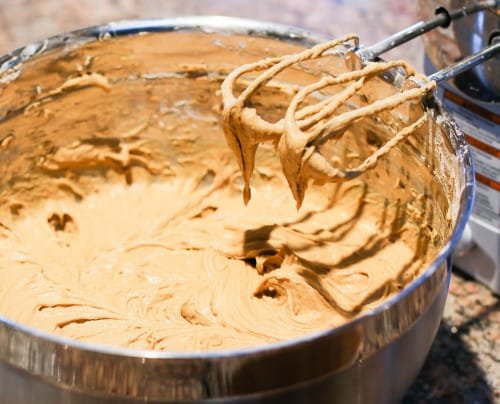
The idea is add flour to the puré to get a consistency of a brownie batter or frosting. In a ratio of 1:1 (Puré : Flour), I add flour, equal amounts of GF all-purpose and Tapioca. Sometimes I add a bit more flour than the puré. The wetter your mixture is, the longer it will take to bake and firm up. In the 4 cup mixture of the puré above, I started with 2 cups GF all-purpose flour and 2 cups Tapioca and added ½ cup more of each.
To mix, I use a hand mixer since tapioca tends to clump, but a spoon will work too.
"Mom, you're looking a little tired. Why bother doing all that work to bake it? Save yourself some energy. Just scoop it right into our mouths!"
At this point, your kitchen helpers may offer you some interesting suggestions. Be sure to tell them you appreciate their concern for your well-being, give them a pet, and get on with your task.
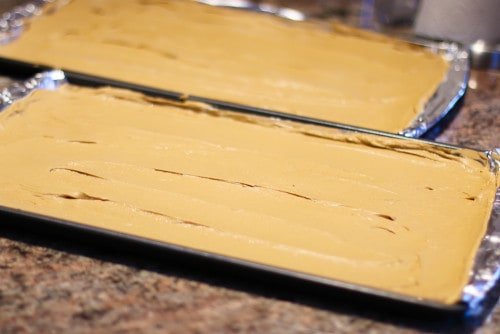
When finished mixing, you’ll need at least two large lightly greased cookie sheets. Spread the mixture between the two and smooth it out until it covers the entire cookie sheet. You can use parchment paper of tin foil if you’d like to line your pans.
Always remember to pay your kitchen helpers!
Now here’s another area where you can get creative. You can either bake these bad-boys quickly and entirely in your oven or you can do them entirely in a dehydrator if you have one, or you can do a little bit of both. I go for a little time in the oven and a little in the dehydrator. I like using the dehydrator, because it keeps the treat softer, but the initial oven baking sets the dough quickly, so I can cut it, then set on the dehydrator on a low heat setting. If baking in the oven, you can try baking it at 350 F for 45 minutes, checking for done-ness and keep baking until dry. In the oven, the longer it bakes at a high temperature, the more it become crumbly. The goal is to keep it pliable and soft, but not to give you sticky fingers as you hand them out. You can also try baking at a lower temperature, 160-200 and use the convection setting if you have it.
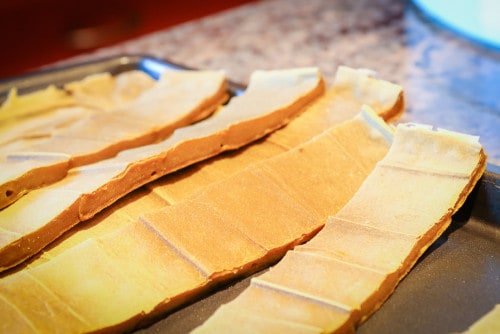
I bake the two sheets at 350 F for 30 minutes. When I take them out, they are still wet on the bottom, but they’re perfectly formed and pliable. You can see that the top is really quite crispy and if I keep going it will be too crunchy. I literally cut the sheets of goop into 1-inch strips with a kitchen scissors.
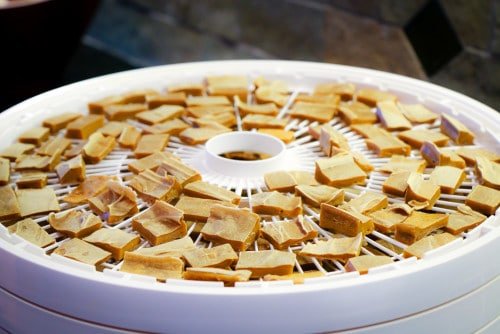
Next I cut them down into smaller rectangles. There will various sizes of thickness, and that’s ok. I set them on the trays, set the temperature low, about 120-130 and set it for about two hours to start and go to three hours if they are still too sticky.
You can do the entire thing in the dehydrator, but you’d have to scoop individual servings onto the screens, which can take a longer time than cutting dough that’s been partially baked. I've done it before that way too. Heck, I even have a jerkey gun that I use for meat jerky that I'm planning to use as an experiment with this recipe too.
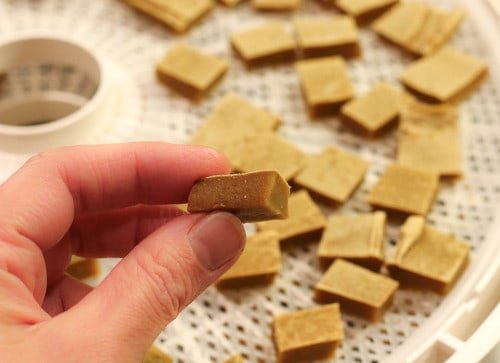
When finished, you'll find some come out thick.
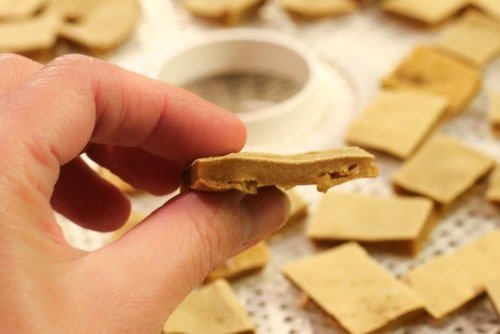
Some come out thin.
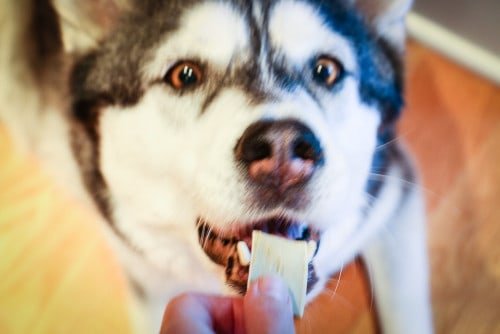
But the kitchen helpers aren't choosey!
Once finished, put them in an airtight container. They will keep in the fridge for 7-10 days. The more they are dehydrated, the longer they keep. But the longer they are dehydrated, the harder they become as well.
I find making Bone Broth Treats so satisfying. The entire chicken, plus old vegetables about to be tossed, get used. Nothing goes to waste!
Here are your Easy Steps to Bone Broth Treats:
- Collect your bones and freeze them.
- Make a bone broth as shown in Part 1 of this post. Leave out the onions.
- Save your strained goop from your bone broth in the refrigerator and use within 3 days or use it the same day you strain your broth.
- Take out any really hard-to-break-down bones from your goop.
- Toss it in the blender with a little bit of your own bone broth.
- Use protective eye gear. Start by breaking down the goop on low speed for 5 minutes, stopping the blender and shaking, or hand mixing, to unstick the blender as needed.
- As it starts to spin smoothly on its own, let the blender run until you have a nice smooth Purée.
- Note how many cups your Purée yields.
- Add equal amounts of flour of your choice to the Purée for a ratio of 1:1 or slightly more to get a batter or frosting texture to your mix. Use a hand mixer or spoon to mix it all up.
- Smooth your batter onto 2 greased cookie sheets (use parchment paper or tin foil if you’d like) and bake at 350 F for 30 minutes. Or you may bake them longer until set. Another option is to bake at a lower temperature 160-200 F for a several hours so they dehydrate rather than bake crunchy.
- Take out and cut them into strips then squares and set them on a dehydrator tray. Dehydrate at a low temperature or 2-3 hours or until your liking.
- Store them in an airtight container in your refrigerator for up to 7 days, if they last that long!
- Make your dogs do stupid pet tricks for awesome bone broth treats!
There you have it Internet! The secret to improving your digestive health and making cheap, delicious dog treats without spending an extra dime! Who says Lyme disease can't make a person economically creative?



Betty Cracker,
What a great use of food items normally tossed. I can't promise I'll be whipping some up.... despite now feeling like a shoddy dog owner with store bought treats! Spending hours shoveling doggie snow paths, getting up at 2am to let the older one out, and foregoing many weekend get-a-ways to stay with the brood should be enough.... So why all this dog owner guilt? LOL!
You're a genius! Now I just have to find my slow cooker from wherever it's buried and I have to buy a blender then I'm all set lol. 😀
Your doggies looks like they are enjoying those delish treats!
http://www.dogsilove.com/category/dog-food/